
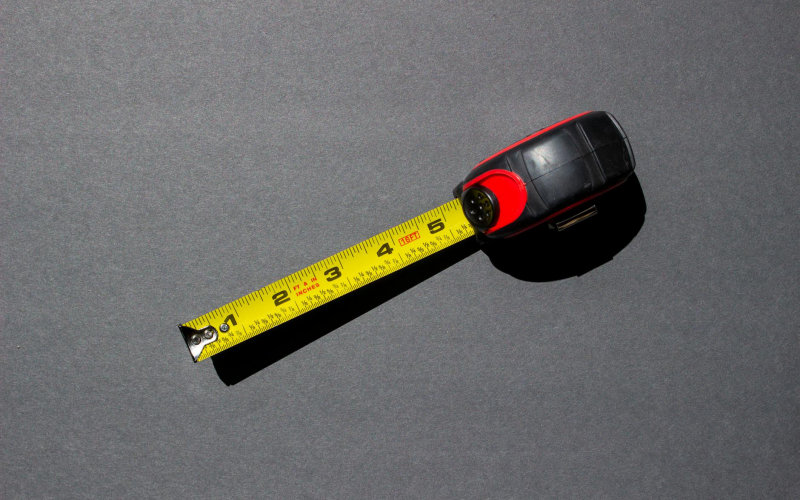

I’ve watched grown adults freeze solid in the lumber aisle at Home Depot, tape measure dangling from one hand, completely stumped by the tiny lines crammed between the inch marks. No shame in that, honestly. Nobody teaches you this. You’re just supposed to absorb it somehow, like parallel parking or decoding a pay stub.
Here’s the thing: a standard tape measure has exactly 16 lines between each inch mark. Once you understand why those lines are different heights, the whole system clicks. Fast, too. I’ve explained this to my 11-year-old and she had it cold in about four minutes.
So whether you’re hanging a shelf, roughing in a doorframe, or just tired of squinting and guessing, this is the guide I desperately wished existed when I started tackling home repairs back in 2009.
Why Tape Measure Lines Are Different Heights (This Is the Key)
The height of each line tells you its fraction value. That’s it. That’s the whole system.
Longer lines represent bigger fractions. The inch mark is tallest. Then the 1/2 inch mark. Then the quarter-inch marks, then eighths, then sixteenths—those short, stubby little lines that make beginners want to throw the tape across the room.
Think of it as a family tree of fractions. Every smaller fraction just splits the previous one in half. An inch becomes halves. Halves become quarters. Quarters become eighths. Eighths become sixteenths. Once that pattern lands, you stop seeing visual noise and start seeing a logical grid.
The Inch Mark: Your Anchor Point
Every large number on the tape is a full inch. That’s it.
On most standard tapes (a DeWalt 25-footer, a Stanley FatMax, whatever you’ve got in the junk drawer), the inch numbers are printed boldly in red or black and are impossible to miss. Everything interesting happens between 0 and 1. Understand that single inch and you understand the entire tape.
Some tapes also mark feet with a small red box around numbers like 12″, 24″, 36″. That’s just a convenience feature for when you’re tracking feet and inches at the same time. Nothing to overthink.
The 1/2 Inch Mark
Dead center between two inch marks, you’ll find the second-tallest line. That’s your 1/2 inch.
If your measurement lands right there, you’d call it something like 3 and a half inches, written as 3-1/2″. Beginners usually spot this one without much trouble since it stands noticeably taller than everything around it (except the inch marks themselves).
Quick exercise: grab any random object nearby and measure it. Find that halfway mark. Sit with it for a second before moving on.
The 1/4 and 3/4 Inch Marks
Now look at the space between the inch mark and the 1/2 inch mark. The line splitting that space right down the middle is your 1/4 inch mark. Do the same thing on the far side of the 1/2 inch mark and you’ve found 3/4.
These are the third-tallest lines on the tape. Not as dramatic as the half-inch, but still clearly taller than the marks surrounding them.
So now you’ve got four landmarks per inch: 0, 1/4, 1/2, and 3/4. And honestly? You can handle most basic home improvement work with just those four points. Lumber dimensions, tile spacing, furniture clearances—a lot of it falls right on one of these marks.
The 1/8 Inch Marks (Where Beginners Start Squinting)
Between each of those quarter-inch marks sits another line. Shorter still. That’s an eighth of an inch.
All eight across one inch, in order: 1/8, 2/8 (which equals 1/4), 3/8, 4/8 (which equals 1/2), 5/8, 6/8 (which equals 3/4), 7/8, and the full inch. Since 2/8, 4/8, and 6/8 are already covered by your quarter and half marks, you’re really adding just four new landmarks: 1/8, 3/8, 5/8, and 7/8.
These show up constantly in real work. Cabinet hardware spacing often lands at something like 5-3/8″. Trim molding cuts hit eighth-inch marks all the time. But don’t worry about sixteenths yet. Nail eighths first.
The 1/16 Inch Marks (The Tiny Lines)
Shortest lines on the tape. Sixteen per inch.
Between every eighth-inch mark, there’s one more tiny line splitting the space. That’s your sixteenth. The ones that don’t overlap with anything larger are: 1/16, 3/16, 5/16, 7/16, 9/16, 11/16, 13/16, and 15/16.
Real talk: for rough carpentry and most DIY projects, you can measure to the nearest eighth and be completely fine. Sixteenths start mattering when you’re doing fine woodworking, fitting windows and doors (where a 1/16″ gap can cause binding), or matching existing trim pieces exactly. A 2019 study by the National Association of Home Builders found that measurement errors rank among the top three causes of material waste in residential renovation, and most of those errors happen at the sixteenth-inch level.
A Cheat Sheet You Can Actually Memorize
You don’t need to memorize 16 fractions. Just remember the hierarchy:
Tallest line = 1 inch. Second tallest = 1/2″. Third tallest = 1/4″ marks. Fourth tallest = 1/8″ marks. Shortest = 1/16″ marks.
And here’s the shortcut I give everyone: count the tiny lines from the last inch mark to where your measurement lands, then put that number over 16. Land on the 5th tiny line past the 3″ mark? You’ve got 3 and 5/16 inches. Works every single time.
Common Beginner Mistakes (And How to Dodge Them)
The hook might be lying to you. Not maliciously—but that metal tab at the end of your tape is designed to slide a little. On purpose. It’s riveted loosely so it compensates for its own thickness depending on whether you’re hooking it over an edge or pushing it flat against a surface. Plenty of beginners assume a loose hook means a broken tape. It doesn’t.
Also, don’t read the tape at an angle. Get your eye level with the blade and look straight down. Even a slight tilt can make a 5/8″ mark read like 3/4″, and suddenly your floating shelf is visibly off.
And measure twice before you cut. Always. That old saying exists because in 2007 I built an entire closet organizer and ended up recuting four of the eight shelves after repeatedly misreading 11/16″ as 3/4″. Not a cheap lesson.
Bottom Line
Here’s something most tape measure guides skip entirely: the specific fraction matters less than building a consistent habit of anchoring before you read. What I mean is—before you call out any measurement, identify the nearest full inch first. Then the nearest half. Then work down to quarters and eighths. Your brain processes fractions much faster when it’s stepping down from a known landmark rather than counting blindly from zero.
Professional carpenters don’t read a tape faster because they’ve memorized more fractions. They read it faster because their eye anchors automatically, without thinking about it. That’s the real skill. And it’s one you can build faster than you’d expect.
Frequently Asked Questions
How many lines are between each inch on a standard tape measure?
There are 16 lines between each inch mark on a standard imperial tape measure. Each line represents 1/16 of an inch.
What does the red mark every 16 inches on a tape measure mean?
That’s your stud spacing indicator. Standard wall studs in American residential construction are placed 16 inches on center, so tape manufacturers mark every 16 inches in red (or sometimes with a small diamond) to help framers work faster without doing mental math.
Can I read a tape measure without knowing fractions?
Sort of. You can handle basic projects using only half and quarter marks. But if you’re cutting anything to fit—trim, shelves, flooring—you’ll eventually hit an eighth or sixteenth and need to know what you’re looking at.
Why does my tape measure have two sets of numbers on it?
One side reads in inches and fractions (imperial), the other in centimeters and millimeters (metric). In the US, most DIY work uses the imperial side. The metric side comes in handy when you’re following instructions from international furniture manufacturers, like IKEA assembly guides.
Photo by Lucent Designs Media International on Pexels

