
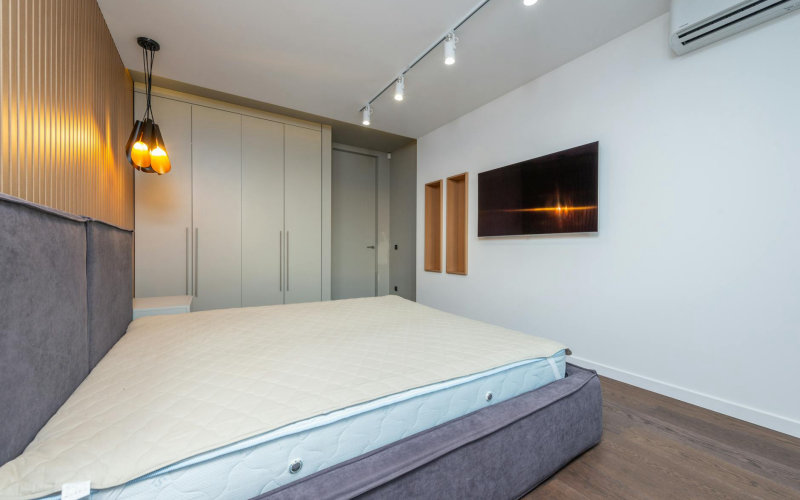

My neighbor got a drum kit in 2019. Not a quiet electronic one — a full acoustic Ludwig five-piece he apparently needed to practice at 10pm on Tuesday nights. I spent three months losing sleep before finally getting serious about this, and what I found genuinely surprised me: you don’t need a contractor or specialty acoustic products to make a real dent in the noise.
Most of the materials doing the actual heavy lifting here are completely unglamorous. Weatherstripping. Door sweeps. Moving blankets. Thick curtains. The kind of stuff your grandparents used for drafts, not “acoustic solutions.” But physics doesn’t care about branding. Mass stops sound waves, and so does absorption — and you can get both at a hardware store for almost nothing.
I’ve since helped three friends tackle versions of this same project, spending anywhere from $60 to $180 depending on room size and how bad their situation was. Here’s what actually works.
Understand the Two Types of Noise You’re Fighting
Before spending a single dollar, figure out what kind of sound is bothering you. Airborne noise — voices, TV, street traffic — travels through gaps and thin surfaces. Impact noise — footsteps, bass thumps, something dropped on the floor above you — travels through the building’s actual structure.
Most budget DIY methods handle airborne noise pretty well. Impact noise is a different beast, usually requiring work on the ceiling or floor, which gets expensive fast. So if your problem is a subwoofer two floors down, manage your expectations now. But if it’s traffic, voices, or a neighbor’s television bleeding through a shared wall, you can genuinely cut that by 50-70% with the right approach.
Seal Every Gap First (This Is the Cheapest Win)
Sound is sneaky. It finds gaps the way water does, and a pencil-sized gap under your door can let in nearly as much noise as the door itself. This is where your first $15-20 goes.
Buy a door sweep — one with a rubber or silicone seal that drags along the floor — and install it on your bedroom door. Most run $8 to $15 at Home Depot. Takes maybe 20 minutes with a screwdriver. Then grab a roll of foam weatherstripping tape (self-adhesive, around $6) and press it into the doorframe on all three sides where the door meets the frame.
Do the same for windows. On a windy day, hold a lit stick of incense near the edges of your window sash — if the smoke wavers, you’ve got a gap. Rope caulk (removable, no tools, about $5 a roll) pressed into those spots is a weekend fix that costs almost nothing and works surprisingly well.
Add Mass to Your Walls With Moving Blankets
Mass-loaded vinyl is what professionals reach for when they want to add density to walls. It also costs $1-2 per square foot and takes real effort to install. My budget alternative? Moving blankets.
A 72″x80″ moving blanket at Harbor Freight runs about $7-8. I’ve hung them using simple curtain rod brackets (around $12 for a pack of two at Lowe’s) or heavy-duty picture hooks. They’re not pretty — not even close. But in a bedroom, especially on a shared wall behind furniture or a headboard, they genuinely absorb mid and high-frequency sound in ways you’ll notice.
Stack two blankets on the same rod if you’re dealing with a particularly loud shared wall. The added mass makes a real difference. And if aesthetics matter to you, a tapestry or fabric panel draped over the whole thing does the job of making it look intentional.
Use Heavy Curtains on Every Window (Even Interior Ones)
Windows are usually the weakest acoustic point in any room. Single-pane windows especially. Thermal blackout curtains pull double duty here because they’re thick, layered, and hang with an air gap between the curtain and the glass — and that air gap actually matters acoustically.
A full-length pair from a home goods store or Amazon runs $25-50 depending on size. If you’re buying curtains anyway, this is essentially zero extra cost for a real sound benefit. I used RYB Home curtains on my street-facing window (bought a pair in 2022 for $38) and noticed the difference the first night. Traffic noise dropped to a genuinely livable level.
Hang them as close to the ceiling as possible, and go wider than the window itself. You want overlap on the sides, not just coverage of the glass.
Treat Corners and Hard Surfaces to Kill Echo
Here’s something most people skip entirely — and it matters more than they think. Acoustic treatment inside the room reduces reverb, and reverb makes transmitted noise sound louder and more grating than it actually is. This is especially true in bedrooms with hardwood or tile floors.
You don’t need acoustic foam panels (though cheap packs exist on Amazon for around $20). Bookshelves stuffed with books, thick rugs, upholstered furniture — all of these break up sound reflections. I added a 5×7 area rug under my bed and a small bookshelf against the wall I shared with my neighbor, and the combination genuinely changed how the room felt to be in.
Corners deserve special attention. Sound pressure builds there. A tall plant, a pile of floor cushions, even a fabric-shaded floor lamp absorbs more than you’d expect from something so simple.
Address the Ceiling If Impact Noise Is the Problem
Living below someone whose footsteps wake you up is its own special misery. Your options get more limited on a budget, but there’s still something worth trying before giving up. Resilient channel — available at most building supply stores for about $1.50 per linear foot — decouples drywall from the joists above, breaking the structural path that impact noise travels through.
But let’s be honest: this is a weekend project for someone comfortable with basic construction. If you’re renting, skip it entirely. Talk to your landlord, focus your energy on the other methods, and make peace with the fact that there’s only so much you can do from below.
Bottom Line
Here’s the thing I haven’t seen spelled out anywhere else: the order you tackle these projects matters more than which specific products you buy. Sealing gaps gives you the most noise reduction per dollar, but most people jump straight to acoustic panels because they look like a “real” solution. They’re not — not for blocking sound, anyway.
A $6 door sweep will outperform a $60 foam kit in most apartments and bedrooms. Do the boring stuff first. Then add mass. Then treat the room acoustically. Follow that sequence and you’ll spend less money and get better results than someone who went straight for the premium products and wondered why they still heard everything.
Frequently Asked Questions
How much does budget bedroom soundproofing DIY actually cost?
For a standard bedroom — sealing gaps, adding curtains, treating one shared wall with moving blankets — expect to spend $60-120. Add a rug and some basic acoustic treatment and you might hit $150-180 total.
Does acoustic foam from the hardware store really work?
Acoustic foam reduces echo and reverb inside the room, but it does almost nothing to block sound coming through walls or windows. It’s absorption, not soundproofing. Don’t rely on foam alone if outside noise is your actual problem.
Can I soundproof a bedroom without damaging the walls?
Yes. Adhesive weatherstripping, tension-mounted curtain rods, heavy furniture placement, and removable rope caulk all work without drilling or permanent changes — which matters a lot if you’re renting.
What’s the single best investment for bedroom soundproofing on a tight budget?
A door sweep. Hands down. It’s under $15, takes 20 minutes to install, and seals the biggest acoustic gap in most bedrooms. Start there before you spend a dollar on anything else.
Photo by Max Vakhtbovych on Pexels

