
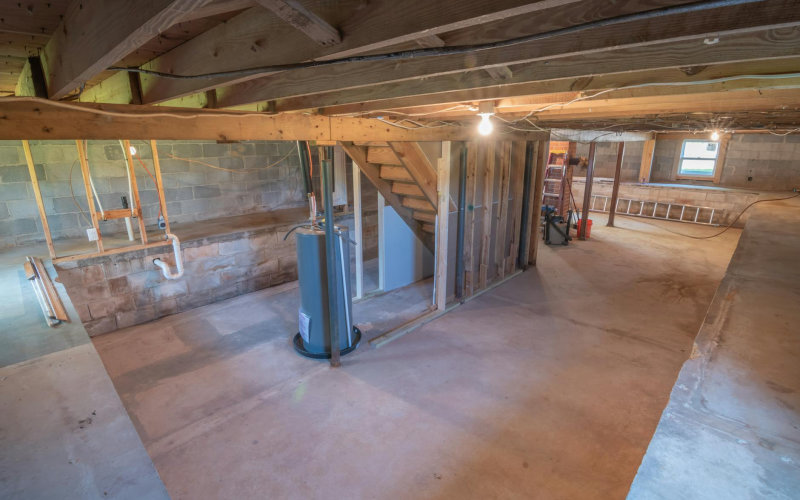

My neighbor called me in a panic last October. Six inches of water in his finished basement, a ruined sectional sofa, a shop-vac that couldn’t keep up. The damage estimate came out to $23,000. And the worst part? His contractor told him 80% of it was completely preventable.
I’ve owned homes for 14 years and dealt with wet basements in two of them—so I’m not approaching this from some theoretical angle. I know what it’s like to rip up soaked drywall at midnight and kick yourself for not doing something sooner. Here’s what I’ve learned: most basement water problems don’t sneak up on you. They telegraph their intentions for months, sometimes years, before anything catastrophic happens.
So if you’re reading this before rain season actually arrives, good. You’ve still got time.
1. Inspect Every Inch of Your Foundation Walls
Start here. Always.
Walk your full perimeter—inside and out—and look for cracks, efflorescence (that chalky white mineral residue on concrete), and any spots where the wall meets the floor feels damp to the touch. A crack under 1/8 inch wide is usually cosmetic. Anything wider, especially a horizontal crack, is a structural red flag that needs a professional’s eyes before you do anything else.
I found a hairline crack in my 2019 home that turned out to be nothing. But a 2021 study by the Portland Cement Association found that horizontal foundation cracks account for roughly 35% of serious basement flooding events. Don’t skip this step just because everything looks fine at a glance.
2. Clean and Seal Interior Cracks With Hydraulic Cement
Once you’ve identified the non-structural cracks, seal them yourself. This is genuinely manageable DIY territory.
Hydraulic cement—brands like Quikrete’s Hydraulic Water-Stop (about $12 for a 10-pound bag) or Drylok Fast Plug—actually expands as it cures, locking into the crack even when active moisture is present. Clean the crack first with a wire brush, undercut the edges slightly with a cold chisel to give the cement something to grip, then mix and press the compound in firm. Hold it for three to five minutes.
But here’s what most tutorials won’t tell you: sealing cracks from the inside only treats symptoms when water is driven by hydrostatic pressure from outside. It buys you time. It isn’t a permanent fix on its own. Pair this step with everything else on this list.
3. Apply Waterproofing Paint or Masonry Sealer to Interior Walls
After you’ve handled the cracks, coat your walls. Drylok Extreme Masonry Waterproofer runs about $45 for a gallon and covers roughly 75 square feet. UGL (United Gilsonite Laboratories) has made this product since 1953—not exactly cutting-edge, but it delivers.
Apply it with a stiff masonry brush rather than a roller so it pushes into the pores of the block. Two coats minimum, with the second coat going on perpendicular to the first.
And skip regular paint entirely. I’ve watched homeowners slap exterior latex down there and wonder why it peeled off in sheets six months later. Masonry waterproofer bonds differently—it plugs the capillary pores in concrete and block instead of just sitting on the surface.
4. Fix Your Gutters and Downspouts First
Here’s an uncomfortable truth most people don’t want to hear: your gutters are probably responsible for at least half your basement moisture problems.
Clogged gutters overflow along the foundation line. Downspouts that terminate too close to the house—anything under 6 feet—dump water right where you absolutely don’t want it. The fix costs almost nothing. Clean the gutters (or pay someone $150 to $200 to do it). Add downspout extensions that carry water at least 6 feet out, ideally toward a slope that pushes it even further from the house.
According to the University of Minnesota Extension’s 2020 homeowner moisture guide, improper grading and drainage issues account for over 65% of wet basement complaints in residential homes. Gutters are a big part of that equation. Fix them before you spend a single dollar on interior products.
5. Regrade the Soil Around Your Foundation
The ground around your house should slope away from the foundation—ideally 6 inches of drop over the first 10 feet. If it’s flat, or worse, sloping inward (which happens naturally as soil settles over time), water pools directly against your foundation walls every time it rains.
This is actually a manageable weekend project. You’ll need topsoil or clean fill dirt, a shovel, a rake, and a level. Materials might run you $50 to $100 for a normal suburban lot.
So why do people skip it? Because it’s physically demanding and doesn’t feel as satisfying as brushing product onto a wall. But proper grading is probably the single highest-ROI step on this entire list. I’m not exaggerating.
6. Install or Inspect Your Window Well Drains
If you’ve got basement windows below grade, you’ve got window wells. And if there’s no gravel and a functional drain at the bottom of those wells, you’ve essentially built a collection basin for rainwater sitting flush against your foundation.
Window well drain kits run about $20 to $30 at any home center. You dig down to the gravel layer beneath the well, install a perforated drain pipe, and backfill with clean gravel. Takes a few hours. Window well covers—the clear polycarbonate bubble style—cost around $30 to $60 each and keep debris and direct rainfall out completely.
I replaced mine in 2022 after a rough spring and noticed a real difference in how the corner of my basement smelled during wet weather. Small fix. Actual results.
7. Test and Service Your Sump Pump Before the Season Starts
Your sump pump is the last line of defense. And nothing’s worse than finding out it’s dead in the middle of a storm.
Pour a bucket of water into the pit and watch it cycle. It should kick on immediately and drain completely. If it struggles, runs continuously, or makes grinding noises, replace it now—not during the next rain event. A solid 1/2 HP sump pump (Zoeller M53, Wayne CDU980E) runs $150 to $250. Battery backup units add another $200 but are absolutely worth it in areas where storms routinely knock out power.
Check the discharge line too. Make sure it isn’t frozen, cracked, or draining somewhere that cycles water back toward your foundation.
Bottom Line
Here’s what nobody in the waterproofing industry particularly wants you to know: the single biggest predictor of basement flooding isn’t your home’s age or your water table depth—it’s deferred maintenance on the simplest, cheapest exterior fixes. Homeowners drop thousands on interior drainage systems and sump pump upgrades while their gutters are packed with leaves and their soil slopes like a bowl around the foundation. Fix the outside first. Interior products are backup, not the headline act.
Frequently Asked Questions
How much does DIY basement waterproofing cost compared to hiring a pro?
A thorough DIY approach covering all 7 steps here will run you roughly $300 to $600 in materials, depending on your basement size. Professional interior waterproofing systems (like those from Basement Systems or B-Dry) typically run $5,000 to $15,000 for an average basement. DIY won’t replace everything a pro system offers, but it handles the majority of common moisture problems for a fraction of the price.
When is the best time to start waterproofing before rain season?
At least 4 to 6 weeks before your region’s heaviest rainfall. In the Midwest and Northeast, that usually means starting late August or early September for fall rains, or February if you’re bracing for spring. Masonry sealers need dry conditions to cure—most require 24 to 72 hours of dry weather after application.
Can I waterproof a basement that already has water in it?
Some steps, yes. Hydraulic cement works in active water conditions. But masonry sealers and waterproofing paints need dry walls to bond correctly. If you’re dealing with standing water or seriously saturated walls, address the active source before touching any interior coatings.
Does waterproofing paint actually work?
For minor moisture transmission and humidity control—yes, it works. For hydrostatic pressure from a high water table or serious foundation cracks—no, not on its own. Think of it as one layer in a system, not a standalone fix. Drylok has third-party testing showing it withstands up to 15 PSI of water pressure, which matters, but it’s still most effective when you’ve sorted out exterior drainage first.
Photo by Curtis Adams on Pexels

